

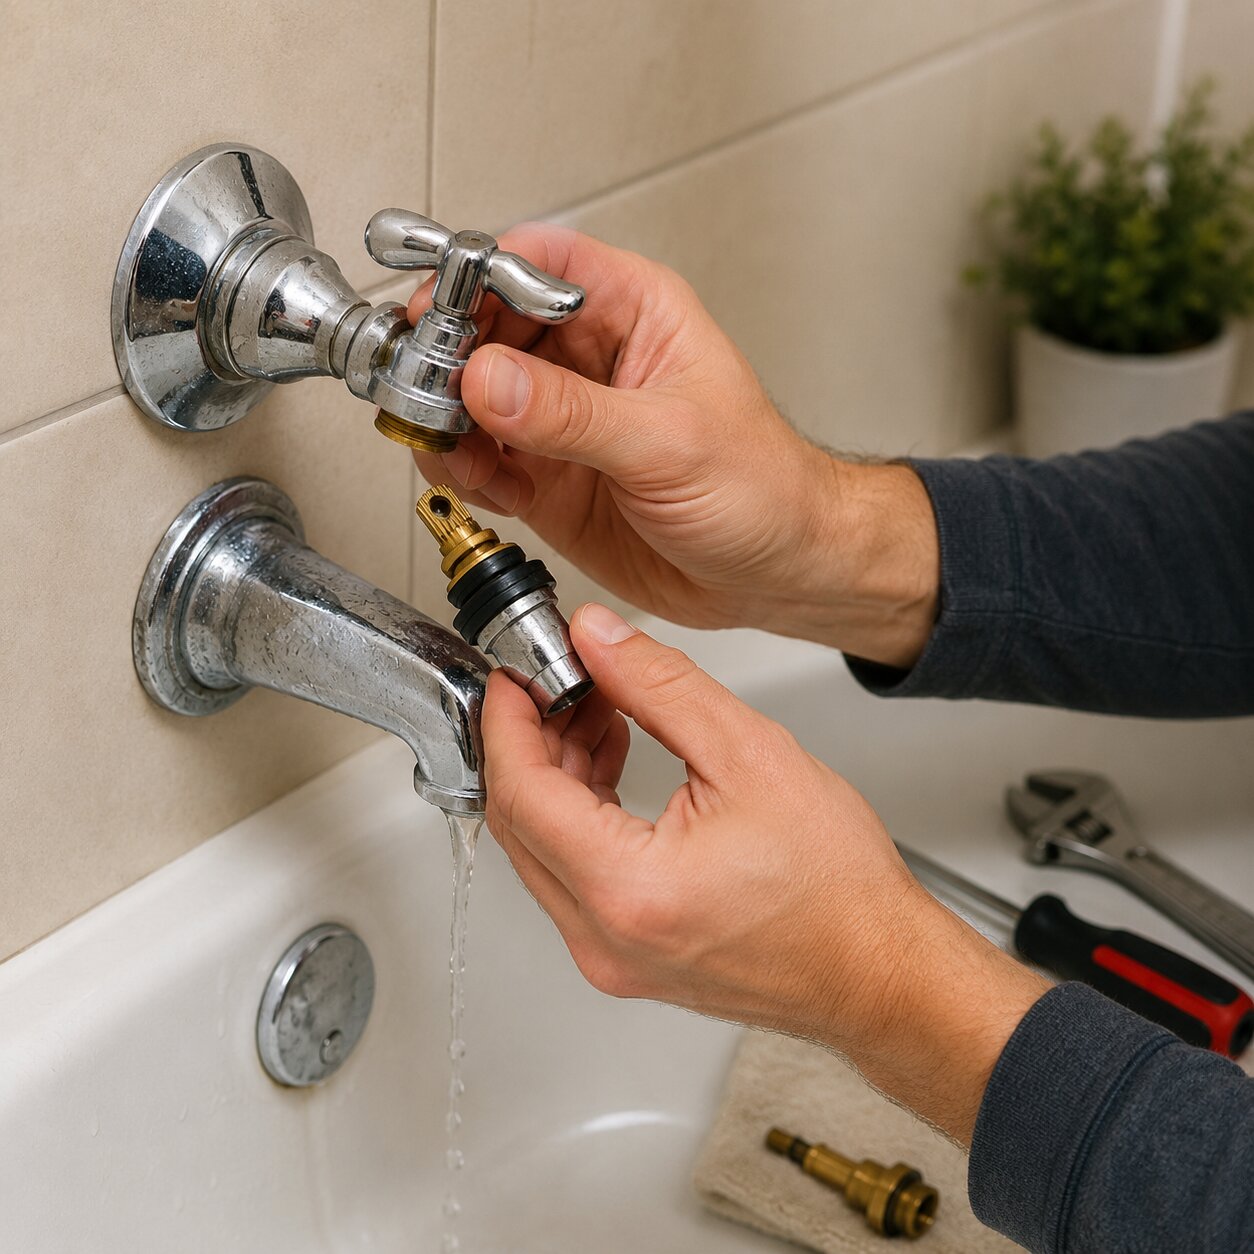
How to Fix a Leaking Bathtub Faucet: The Complete DIY Guide to Stop Drips and Save Money
How to fix a leaking bathtub faucet is one of the most common plumbing questions homeowners search for when they notice an annoying drip coming from their bathroom. A leaking bathtub faucet isn’t just irritating—it can waste thousands of gallons of water every year, increase your utility bills, and eventually damage your plumbing system if left untreated.
The good news is that most cases of a dripping bathtub faucet can be repaired without hiring a professional plumber. Whether you have a single-handle bathtub faucet, a double-handle tub faucet, or a modern cartridge system, understanding the cause of the leak is the first step toward fixing it.
In this comprehensive guide, you’ll learn everything from diagnosing the problem to replacing worn-out components and preventing future leaks.
Why Learning How to Fix a Leaking Bathtub Faucet Matters
Many homeowners ignore a small drip because it seems harmless. Unfortunately, even a slow leak can have significant consequences.
A faucet dripping once every second can waste more than 3,000 gallons of water annually, leading to higher water bills and unnecessary environmental waste. Continuous moisture can also encourage mold growth, stain your bathtub, and wear out plumbing components much faster.
Learning how to stop a bathtub faucet from dripping not only saves money but also extends the lifespan of your bathroom fixtures.
Benefits of repairing the leak include:
- Lower monthly water bills
- Reduced water waste
- Improved plumbing efficiency
- Prevention of mold and mildew
- Longer faucet lifespan
- Better bathroom appearance
- Increased home value
If you enjoy DIY home improvement projects, repairing a leaking tub faucet is one of the easiest plumbing jobs to learn.
Why Is Your Bathtub Faucet Leaking?
Before beginning any repair, it’s important to understand why your faucet is leaking.
Every bathtub faucet contains internal parts that create a watertight seal whenever the handles are turned off. Over time, these components naturally wear out because of daily use, mineral deposits, and hard water.
When these seals become damaged, water continues flowing through the faucet even after it has been turned off.
Some leaks are constant, while others only occur after using hot water or when the faucet is under pressure.
Understanding the source of the leak will help you determine the correct repair method.
Common Causes of a Dripping Bathtub Faucet
Several issues can cause a bathtub faucet leaking from the spout.
1. Worn-Out Faucet Cartridge
Modern faucets typically use cartridges to regulate water flow.
Over time, these cartridges wear down due to friction and mineral buildup, making them one of the leading causes of bathtub faucet leaks.
Signs include:
- Constant dripping
- Difficulty turning handles
- Uneven water flow
- Stiff faucet operation
In many cases, a simple bathtub faucet cartridge replacement completely solves the problem.
2. Damaged Rubber Washer
Older faucets often rely on rubber washers to create a waterproof seal.
As these washers age, they become brittle, flattened, or cracked.
Common symptoms include:
- Slow dripping
- Water leaking after turning off the faucet
- Increased dripping when water pressure changes
Replacing the washer is inexpensive and usually takes less than 30 minutes.
3. Faulty Faucet Seat
The valve seat connects the faucet to the plumbing system.
Mineral buildup and corrosion can create tiny gaps that allow water to leak continuously.
Cleaning or replacing the valve seat often restores proper sealing.
4. Worn Valve Stem
Another common issue involves the valve stem.
A damaged stem may prevent the faucet from shutting completely, causing continuous dripping.
Many homeowners performing bathtub faucet repair replace both the valve stem and washer at the same time to ensure a long-lasting fix.
5. Loose or Damaged O-Rings
O-rings are small rubber rings that prevent leaks around moving faucet components.
If an O-ring wears out, you may notice:
- Water leaking near the handle
- Moisture behind the trim plate
- Reduced faucet performance
Replacing an O-ring is one of the simplest plumbing repairs.
Tools You’ll Need Before Starting
Before learning how to fix a leaking bathtub faucet, gather all necessary tools.
Having everything ready makes the repair process much smoother.
Basic Plumbing Tools
- Flathead screwdriver
- Phillips screwdriver
- Adjustable wrench
- Allen wrench set
- Slip-joint pliers
- Needle-nose pliers
- Utility knife
Replacement Parts
- Faucet cartridge
- Rubber washers
- O-rings
- Valve stem
- Faucet grease
- Plumber’s tape
Cleaning Supplies
- White vinegar
- Soft cloth
- Toothbrush
- Small wire brush
- Bucket
- Towels
Having the correct replacement parts is crucial because manufacturers often use different cartridge designs.
How to Identify Your Bathtub Faucet Type
One of the biggest mistakes homeowners make during DIY bathtub faucet repair is purchasing the wrong replacement parts.
Before disassembling your faucet, determine which style you have.
Single-Handle Bathtub Faucet
A single-handle bathtub faucet controls both water temperature and flow using one lever.
These faucets usually contain:
- Ceramic cartridges
- Ball valves
- Pressure-balancing cartridges
Repairing them typically involves replacing the cartridge.
Double-Handle Bathtub Faucet
A double-handle bathtub faucet has separate controls for hot and cold water.
Each handle contains its own:
- Valve stem
- Washer
- Seat
- O-ring
Leaks may originate from either side, so inspect both carefully.
Three-Handle Bathtub Faucet
Older homes may still have three-handle systems.
These include:
- Hot water handle
- Cold water handle
- Diverter handle
Each component can independently develop leaks, making diagnosis slightly more involved.
How to Fix a Leaking Bathtub Faucet:
Step 1 – Turn Off the Water Supply
Before attempting any bathtub faucet repair, shut off the home’s water supply.
Most bathrooms have local shut-off valves behind an access panel.
If not, turn off the main water valve supplying the house.
After shutting off the water:
- Open the bathtub faucet.
- Allow remaining water to drain.
- Plug the drain to prevent screws or small parts from falling inside.
- Lay a towel over the tub to protect its surface from dropped tools.
Taking these precautions helps avoid unnecessary frustration during the repair process.
Step 2 – Remove the Faucet Handle
The next step in learning how to fix a leaking bathtub faucet is carefully removing the faucet handle.
Begin by locating the decorative cap covering the mounting screw. Gently pry it off using a flathead screwdriver or utility knife, taking care not to scratch the finish.
Once exposed, remove the screw and slide the handle off the valve stem. If the handle is difficult to remove due to mineral buildup, applying a penetrating lubricant and gently wiggling it free can help.
With the handle removed, you’ll have access to the internal components that are often responsible for a bathtub faucet leaking from the spout.
Step 3 – Inspect the Internal Components
Once the handle has been removed, carefully inspect the faucet’s internal parts. This is where you’ll usually find the source of the leak.
Look for:
- Cracked or worn rubber washers
- Damaged O-rings
- Corroded valve stems
- Mineral buildup around the cartridge
- Broken ceramic discs
- Rust or corrosion inside the valve body
If you notice heavy mineral deposits, soak the affected parts in white vinegar for 20–30 minutes before cleaning them with a soft brush. Removing buildup can restore smooth operation and improve the effectiveness of your repair.
Step 4 – Replace the Faucet Cartridge
One of the most common solutions for how to fix a leaking bathtub faucet is replacing the faucet cartridge.
Cartridges control both water flow and temperature in most modern faucets. Over time, they wear out, allowing water to seep through even when the faucet is turned off.
How to Replace a Bathtub Faucet Cartridge
- Remove the retaining clip or nut holding the cartridge in place.
- Pull the cartridge straight out using pliers or a cartridge puller.
- Compare the old cartridge with the new one to ensure an exact match.
- Apply a thin layer of plumber’s grease to the new cartridge.
- Insert the replacement cartridge in the correct orientation.
- Reinstall the retaining clip or mounting nut securely.
A successful bathtub faucet cartridge replacement often eliminates persistent drips immediately.
Step 5 – Replace Worn Washers and O-Rings
If your bathtub faucet uses compression valves instead of cartridges, replacing the rubber washer is usually the most effective repair.
How to Replace the Washer
- Unscrew the valve stem.
- Remove the worn washer from the end.
- Install a new washer of the same size.
- Tighten the retaining screw.
- Inspect and replace any damaged O-rings.
- Reassemble the valve.
This simple repair is one of the easiest ways to stop a bathtub faucet from dripping and can often be completed in less than an hour.
Step 6 – Inspect the Valve Seat
Even after replacing washers or cartridges, your faucet may continue leaking if the valve seat is damaged.
The valve seat connects the faucet to the plumbing system and provides a sealing surface for the washer.
Signs of a faulty valve seat include:
- Continued dripping after replacing washers
- Corrosion around the opening
- Rough or uneven metal surfaces
Use a valve seat wrench to remove and replace it if necessary. If mineral buildup is minor, cleaning it thoroughly may be enough to restore a proper seal.
Step 7 – Reassemble the Faucet
After replacing the faulty components:
- Reinstall the valve stem or cartridge.
- Tighten all mounting hardware.
- Reattach the faucet handle.
- Replace the decorative cap.
- Remove the drain plug.
- Turn the water supply back on slowly.
Avoid overtightening screws, as this can damage new parts or crack plastic components.
Step 8 – Test Your Repair
Turn the faucet on and off several times to ensure it operates smoothly.
Check for:
- No dripping after shutting off the water
- Smooth handle movement
- No leaks around the handle
- Proper hot and cold water operation
- Consistent water pressure
If the faucet continues leaking, double-check that the replacement parts match your faucet model and that all components are seated correctly.
When Should You Replace the Entire Bathtub Faucet?
Sometimes repairing the faucet isn’t the most cost-effective option.
Consider a complete bathtub faucet replacement if:
- The faucet is over 15 years old.
- Multiple parts are severely corroded.
- Replacement parts are no longer available.
- The faucet leaks repeatedly despite repairs.
- The finish is badly damaged.
- You want improved water efficiency or a modern design.
A new faucet can improve both the appearance and functionality of your bathroom while reducing future maintenance.
Tips to Prevent Future Bathtub Faucet Leaks
Once you’ve learned how to fix a leaking bathtub faucet, a few simple maintenance habits can help prevent future problems.
1. Avoid Overtightening the Handles
Many people turn faucet handles too tightly when shutting off the water. This puts unnecessary pressure on washers, cartridges, and valve stems, causing them to wear out faster.
2. Clean Mineral Deposits Regularly
Hard water leaves mineral deposits inside the faucet that can damage internal components.
Clean your faucet every few months using white vinegar to dissolve scale and maintain smooth operation.
3. Replace Worn Parts Promptly
If you notice a small drip or stiff handle, replace worn washers or O-rings before the problem worsens. Early maintenance is far less expensive than repairing extensive water damage.
4. Check for Water Pressure Issues
Excessively high water pressure can shorten the lifespan of your faucet’s internal parts. If leaks occur frequently throughout your home, consider testing your water pressure or installing a pressure regulator.
5. Perform Routine Inspections
Every few months, inspect your bathroom fixtures for signs of moisture, corrosion, or loose handles. Catching problems early can prevent costly repairs later.
Common Mistakes to Avoid During DIY Bathtub Faucet Repair
Many DIY repairs fail because of a few avoidable mistakes.
Avoid the following:
- Forgetting to turn off the water supply
- Buying the wrong replacement cartridge
- Losing small screws or retaining clips
- Overtightening plumbing components
- Reusing old washers or O-rings
- Ignoring mineral buildup inside the faucet
- Using excessive force when removing handles
Taking your time and using the correct replacement parts will increase the chances of a successful repair.
Final Thoughts
Learning how to fix a leaking bathtub faucet is a practical skill that can save you money, reduce water waste, and extend the life of your bathroom fixtures. In most cases, a dripping faucet is caused by a worn cartridge, damaged washer, faulty valve stem, or deteriorated O-ring—all of which are affordable and relatively easy to replace with basic tools.
By following the step-by-step process in this guide, you can confidently diagnose the problem, perform the necessary bathtub faucet repair, and restore your faucet to proper working condition. Regular maintenance, periodic inspections, and timely replacement of worn components will help prevent future leaks and keep your plumbing system running efficiently for years to come.
Whether you’re dealing with a single-handle bathtub faucet, a double-handle bathtub faucet, or an older three-handle design, taking action as soon as you notice a drip will protect your home from unnecessary water waste and costly repairs.
FAQs
Why is my bathtub faucet still dripping after replacing the cartridge?
This usually indicates a damaged valve seat, incorrect cartridge installation, worn O-rings, or a cartridge that doesn’t match your faucet model. Inspect each component carefully and ensure all parts are installed correctly.
Can I fix a leaking bathtub faucet without replacing any parts?
Sometimes. If the leak is caused by mineral buildup or loose components, cleaning and tightening the faucet may solve the problem. However, worn washers, cartridges, or valve stems typically need to be replaced.
How much does it cost to fix a leaking bathtub faucet?
DIY repairs generally cost between $10 and $50, depending on the replacement parts needed. Hiring a professional plumber can cost $150 to $400 or more, depending on the complexity of the repair and local labor rates.
How long does bathtub faucet repair take?
Most homeowners can complete a basic DIY bathtub faucet repair in 30 to 90 minutes, provided they have the correct tools and replacement parts.
Should I repair or replace my bathtub faucet?
If the faucet is relatively new and the leak is caused by a worn washer or cartridge, repairing it is usually the best option. If the faucet is old, heavily corroded, or has recurring issues, replacing it may save money in the long run.
Finally, we suggest checking out The Reca Blog for more insightful articles.